Ravendawn Online: Power Up Your Legacy Level Guide

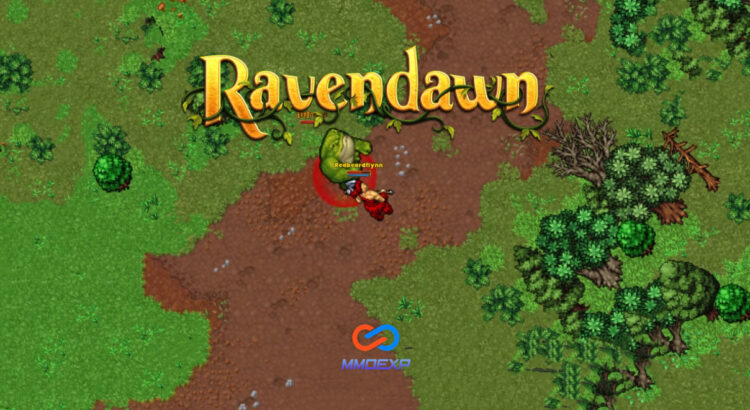
Today, we’re diving deep into the world of Legacy Leveling, unlocking your true potential and maxing out that house plot. While standard archetype leveling is crucial, Legacy Leveling opens doors to powerful skills and boosts your overall character strength. So, grab your pickaxes and shovels, because we’re unearthing hidden XP gems!

Inactive Skill Points: The Secret Weapon

Did you know every 10 inactive archetype levels grants a precious skill point? That’s right, diversifying your skillset pays off even when not actively using those archetypes. By strategically swapping lower-level archetypes, you can:

  1. Optimize Effective Level: Keep your effective level 8-10 levels below targeted monsters for maximum XP gain. Swap in lower-level archetypes like Holy or Spiritual to balance your high-level ones like Warfare or Archery.
  2. Power Level Efficiently: Combine a strong AOE archetype (Warfare, Wizardry) with a low-level one for grinding popular spots like Worms, Pirates, or Turtles. This method supercharges your Legacy Level progress.
  3. Unlock Powerful Skills: Accumulate those inactive skill points! They translate into potent abilities further down the line, enhancing your character’s versatility and power.

Remember, this is a long-term strategy, but the rewards are substantial. Most high-level players utilize this technique, so don’t be left behind!

Beyond Monsters: XP Treasures Everywhere

While battling monsters is key, other avenues offer hidden XP riches:

  1. Crafting Mastery: Don’t underestimate the power of crafting! Exceeding your Supply limit unlocks “Over Supply,” allowing bulk crafting for massive XP gains. Research profitable recipes, gather materials, and craft away! You might even turn a Ravendawn silver profit while leveling up.
  2. House & Community Plots: Tend to your land! Planting trees, raising livestock, and harvesting crops yield significant XP. Don’t let those resources go to waste – maximize your plot’s potential for a steady stream of experience.
  3. Ranger’s Company: This faction offers more than just camaraderie. Completing tasks rewards you with incredible gear, including the powerful “Ranger’s Necklace” with impressive stats. Don’t miss out on these valuable XP boosts!

Remember, Ravendawn is a dynamic world:

Balance Patches: Keep an eye out for updates that might alter the effectiveness of certain strategies. Adapt your methods accordingly to stay ahead of the curve.

Community & Experimentation: The Ravendawn community is a treasure trove of knowledge. Share your discoveries, learn from others, and don’t be afraid to experiment! There’s always a new way to optimize your Legacy Leveling journey.

Embrace the Adventure:

Leveling up isn’t just about numbers; it’s about the journey. Explore hidden corners, delve into diverse content, and enjoy the thrill of discovery. With dedication and a dash of resourcefulness, you’ll reach your Legacy Leveling goals and become a true force in Ravendawn.

So, adventurers, grab your tools, sharpen your skills, and embark on your Legacy Leveling adventure! Remember, the most valuable treasures are not just XP, but the knowledge, camaraderie, and excitement you gain along the way. Happy leveling!

Efficient Food Farming Techniques Guide in Skull and Bones

In the vast expanse of the open seas, survival often hinges on the availability of resources, and in the world of Skull and Bones, food reigns supreme. Whether you’re a seasoned sailor or a rookie captain, mastering the art of acquiring sustenance quickly can mean the difference between victory and defeat. In this comprehensive guide, we’ll delve into the importance of food, particularly for maintaining speed and stamina, and explore efficient farming techniques to ensure you never go hungry on the high seas.

Understanding the Importance of Food

Skull and Bones is not just about navigating treacherous waters and engaging in intense naval battles; it’s also about managing your resources effectively. Among these resources, food plays a crucial role, serving as fuel for both your ship and your crew. With constant trimming and maneuvering, your ship’s stamina depletes rapidly, making it essential to replenish it with nourishment.

The Poacher’s Cache: A Bounty of Bananas

Located to the northwest of St. Anne, the Poacher’s Cache outpost is a treasure trove for savvy sailors seeking to stock up on provisions swiftly. Setting sail from this outpost, you’ll find yourself close to a hidden bounty of bananas, nestled amidst a cluster of trees. By navigating carefully and harvesting these bananas, you can amass a substantial supply of food in no time.

Efficient Harvesting Techniques

To maximize your banana harvest, it’s crucial to employ efficient harvesting techniques. Aim to hit the green zone consistently during the harvesting process to yield optimal results. While a yellow hit may yield a modest quantity of bananas, green hits typically result in a bounty ranging from 11 to 13 bananas per tree. With diligent harvesting, you can accumulate an impressive stash of bananas to sustain your crew’s needs.

Cooking and Preparation

Upon returning to the Poacher’s Cache outpost with your haul of bananas, it’s time to transform them into a more potent form of sustenance. Head to the cookery and utilize the grilling function to convert your bananas into grilled bananas. Not only does this enhance their nutritional value, but it also boosts their effectiveness in restoring stamina. With a stockpile of grilled bananas at your disposal, you’ll be well-equipped to tackle the challenges that lie ahead.

Optimizing Food Consumption

To ensure efficient utilization of your food reserves, it’s advisable to prioritize grilled bananas over other food types. By configuring your food wheel to prioritize grilled food, you can seamlessly transition between different types of food as needed. This strategic approach allows you to maintain a steady supply of nourishment during extended voyages without depleting your resources unnecessarily.

Continuous Farming and Sustainability

The beauty of the Poacher’s Cache method lies in its sustainability and repeatability. By periodically revisiting the outpost or waiting for the bananas to respawn, you can establish a continuous farming routine to sustain your crew’s dietary needs. Whether you choose to embark on quests or simply wait for the bananas to replenish, the opportunity for replenishing your food supply is ever-present.

Enhancing Ship Performance

Beyond merely satisfying hunger, a well-stocked supply of food can significantly enhance your ship’s performance during naval engagements. By consuming grilled bananas strategically, you can replenish stamina on the fly, enabling sustained trimming and maneuvering at top speeds. This newfound agility and endurance can turn the tide of battle in your favor, ensuring victory in even the most challenging encounters.

Conclusion

In the unforgiving world of Skull and Bones, survival depends on more than just skill and firepower; it hinges on resourcefulness and adaptability. By mastering the art of food farming, you can ensure that your crew remains well-fed and ready for whatever challenges the open seas may present. With the Poacher’s Cache method as your guide, you’ll never have to worry about running low on provisions again.

Hope Skull and Bones Food Farming Techniques Guide is helpful. For more guides and all the latest news on Skull and Bones or to buy Skull and Bones Silver, check out MMOexp.com.

Mastering the Early Game in Elden Ring: Guide to Essential Items

Greetings, fellow Elden Ring enthusiasts! As the highly anticipated DLC “Shadow of the Erdtree” approaches, many players are gearing up to face new challenges and explore uncharted territories. In my quest to prepare for the upcoming expansion, I found myself in need of a well-planned Early-Game route to gather essential items like Golden Seeds, Sacred Tears, and Smithing Stones efficiently. In this article, I present to you an optimized route that not only ensures the acquisition of these crucial items but also allows you to upgrade your weapons significantly. The best part? You can achieve all this without engaging in combat along the way. Let’s delve into the details of this strategic route.

Creating Your Character:

The journey begins with character creation. Choose the Golden Seed as your keepsake; this decision will set the tone for your adventure.

Church of Elleh and Gatefront Exploration:

Head over to the Church of Elleh to pick up your first Smithing Stone. From there, make your way to Gatefront to collect Torrent, Map Fragment, and the Whetstone Knife. Return to the Church of Elleh to obtain the Summoning Bell. Next, head to the beach to secure a Gold-Pickled Fowl Foot. Proceed to Gatefront once again, pass through the Stormgate to get your first Golden Seed, and activate the Stormhill Shack site of grace.

Eastern Exploration:

Head east, collecting Elden Ring runes and a cracked statue that houses smithing stones. Teleport back to Gatefront, travel to a bridge for another smithing stone, and continue exploring for additional valuable items. Noteworthy pickups include Somber Smithing Stones, Golden-Pickled Fowl Foot, Fevor’s Cookbook, and more.

Journey to Fort Haight:

Make your way to Fort Haight, collecting a Golden Seed in front of the fort and climbing the tower to obtain the left half of the Dectus Medallion. Continue your exploration, collecting smithing stones, and Golden Seeds along the way. Head to the Bridge of Sacrifice, but be cautious of wolves, and proceed to collect valuable items.

Church Visits and Caelid Exploration:

Visit various churches for Flasks, Sacred Tears, and Golden Seeds. Explore Caelid, collecting items such as the Right Half of the Dectus Medallion, Radagon’s Soreseal talisman, and Somber Smithing Stones. Navigate through Volcano Manor, encountering challenges but avoiding combat. Obtain valuable items like Golden Runes and Smithing Stones.

Crumbling Farum Azula:

Utilize a clever wrong warp to Crumbling Farum Azula, collecting Somber Stones without engaging in combat. The guide provides a step-by-step process to execute this maneuver successfully.

Conclusion:

By following this optimized route, you can amass Golden Seeds, Sacred Tears, and Smithing Stones, allowing for significant weapon upgrades and character progression. The guide emphasizes a no-combat approach, making it accessible to a wide range of players. Whether you’re a seasoned Elden Ring veteran or a newcomer seeking an efficient Early-Game strategy, this comprehensive guide aims to enhance your gaming experience.

Closing Words:

I hope this guide proves valuable in your Elden Ring adventures. If you have suggestions for further route optimization or found the information helpful, consider liking and subscribing for more Elden Ring content. Thank you for reading, and may your journey in the Lands Between be filled with triumphs and discoveries!

Keep up to date with MMOexp site! And also can buy Elden Ring Runes here!

Mastering the Diablo 4 Season 3 Gauntlet

In this detailed Diablo 4 Gauntlet guide, we’ll explore the intricacies of The Gauntlet itself and the accompanying Leaderboards, providing essential information to help players navigate this challenging aspect of Season 3.

Introduction to The Gauntlet:
The Gauntlet, a significant feature of Diablo 4 Season 3, is a timed, fixed seed, non-linear dungeon. This unique structure ensures that the positions of monsters, layouts, and affixes remain constant for all players. The advantage of a fixed seed is fair competition, as every player faces the same challenges within The Gauntlet. It will be released a few weeks into the Season, allowing players time to prepare before venturing into this competitive dungeon.

Preparation for The Gauntlet:
While The Gauntlet won’t be available immediately at the start of Season 3, players can use this time to prepare. As the release approaches, updated Diablo 4 Meta builds will be available, providing optimal strategies for tackling The Gauntlet. Being in World Tier 4 is a prerequisite to compete, and while reaching level 100 is not mandatory, it is advised as the dungeon is designed to challenge fully leveled characters.

Gauntlet Mechanics:
Players familiar with Diablo 3’s Gauntlets will find similarities in Diablo 4. The dungeon is non-linear, and loot doesn’t drop from monsters or chests during the run. Instead, loot drops at the end of the timed run, eliminating the need to pick up items during the intense gameplay. Proofs of Might, pick-ups dropped by monsters and chests, must be collected within a limited time to maximize the score. Your score determines the seal awarded, with the coveted “Seal of the Worthy” placing you among the top 1000 players.

Leaderboards:
The Leaderboard adds an extra layer of competition to The Gauntlet experience. It showcases the top 1000 players earning the prestigious “Seal of the Worthy.” The leaderboard resets weekly, aligning with the dungeon reset. Players can compete in various categories, including solo, 2-player, 3-player, and 4-player parties, with separate leaderboards for each class. Additional filters for platform, region, clan friends, and Hardcore or Non-Hardcore players enhance the competitive landscape.

Hall of the Ancients:
At the end of each week, a permanent leaderboard known as the Hall of the Ancients is established. This eternal leaderboard displays the top 10 players for each week in every Season, creating a lasting record of remarkable achievements.

Conclusion:
The Diablo 4 Season 3 Gauntlet introduces an exciting dynamic to the gameplay, catering to a diverse range of players. The delayed release offers a valuable preparation period for participants. While aiming for the top positions is a commendable goal, even competing and placing in the Gauntlet brings rewards. Whether you strive to be the best or simply test your mettle, the Diablo 4 Gauntlet ladder awaits. Best of luck on your Gauntlet journey in Season 3!

Best Diablo 4 gold and Diablo IV items for sale Season 3 on mmoexp.com, shop now and more off, giveaway, free gold for you. Welcome.

Seeking Equilibrium: Identifying the Most Well-Balanced Class

In the realm of “Dark and Darker,” where the constant clamor for buffs and nerfs echoes, it’s refreshing to take a moment and ponder which class resides in a harmonious sweet spot, requiring no immediate alterations. As a player deeply immersed in 2v2 battles, my perspective leans towards evaluating class balance within this particular setting.

Wizard:
In the context of 2v2, the wizard appears slightly weaker in Ruins due to the formidable prowess of the ranger. However, when operating with only one teammate, the wizard overall maintains a balanced feel. It’s a testament to the game’s equilibrium that the wizard, despite facing challenges in specific environments, doesn’t emerge as an overpowering force.

Fighters:
Fighters showcase considerable strength, especially when adopting a knockoff ranger playstyle. The intricacies of Plate Longbow fighters countering Rangers add an interesting layer, making them potent adversaries without reaching an annoying level of dominance.

Barbarian:
The barbarian, on the other hand, stands a bit weaker in the balance scale. The absence of Plate, coupled with a general reluctance to build PDR, exposes them to significant damage while attempting to close in on a ranger. This vulnerability places them on the weaker end, urging a reconsideration of their balancing.

Bard:
Bards demonstrate versatility, proving to be decent against most classes. However, their Achilles’ heel surfaces in confrontations with Rangers. The lack of a safe approach or PDR leaves bards vulnerable, warranting a closer look at their overall balance in the 2v2 landscape.

Rogues:
Rogues introduce a unique dynamic, capable of reaching seemingly unreachable spots even with the -20 speed from the Double Jump perk. While they tend to lose in straightforward 1v1 scenarios, their knack for surprise attacks, dropping from the skies unnoticed, injects an element of annoyance and unpredictability into the gameplay.

Rangers:
Rangers emerge as a notable challenge, characterized by their inherent annoyance. The game’s map structure often favors them, offering expansive sightlines that, coupled with their rapid-fire capabilities, can be daunting. The suggestion to address ranged damage across the board, especially for Rangers, underscores the need for a nuanced approach to balance. The intricacies of strafing are acknowledged, but the argument for making melee interactions more interactive resonates.

Warlocks:
Warlocks hover in the realm of okayness, grappling with the significant challenge posed by Rangers. The need for adjustments in their interaction with Rangers signals a potential avenue for fine-tuning their balance without disrupting their effectiveness against other classes.

Cleric:
The cleric stands as a paragon of balance, embodying strength in melee encounters and providing valuable healing support. While formidable, the cleric’s impact in 2v2 is not as overwhelming as it can be in trios, showcasing a commendable balance in their role within different team compositions.

In the spirit of constructive feedback, the call for a reduction in ranged damage’s ubiquity resonates. Singling out Rangers as the primary culprits underscores their dominance in certain scenarios. Proposals to alter the dynamics of ranged attacks and perhaps redefine the role of the wizard in the face of these changes introduce compelling avenues for exploration.

In conclusion, the pursuit of equilibrium in class balance is an ongoing endeavor, intricately woven into the evolving fabric of “Dark and Darker.” The call for measured adjustments, especially in ranged damage dynamics, reflects the community’s desire for a more interactive and engaging gameplay experience. As the game’s landscape continues to shift, finding that delicate equilibrium remains a paramount goal for both players and developers alike.

Personally, I would suggest that balancing of professions, balancing of skills, and balancing of the Dark and Darker Gold and gear markets is especially important.