Complete Guide to the Ring of Suffering in OSRS

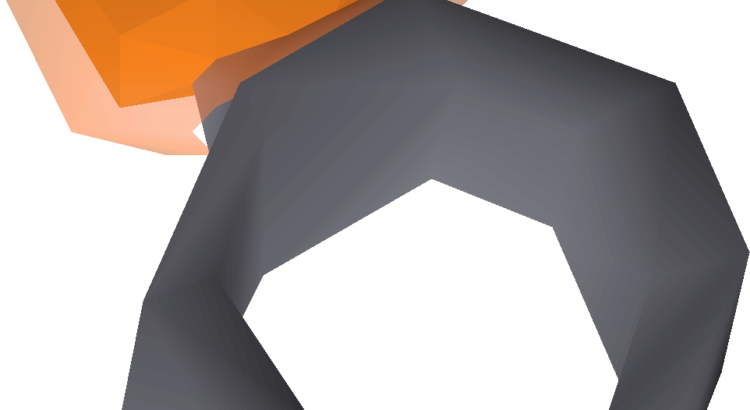
In Old School RuneScape (OSRS), few accessories offer the same combination of defense, utility, and convenience as the Ring of Suffering. Designed primarily for defensive setups, this powerful Zenyte ring is especially popular in high-level PvM encounters where survivability and passive damage matter. Boss fights such as Zulrah, God Wars Dungeon encounters, and certain Wilderness bosses become significantly easier when you have this ring equipped.

Because of its unique mechanics and impressive defensive bonuses, the Ring of Suffering has become one of the most widely used endgame rings in OSRS. Whether you plan to craft it yourself or use accumulated OSRS gold to purchase it, understanding the full process of obtaining and upgrading this ring will help you make the most of it.

What Makes the Ring of Suffering So Powerful?

The Ring of Suffering is one of the four Zenyte jewelry items in the game. These items are considered some of the strongest accessories available due to their powerful bonuses and usefulness in PvM content.

The Ring of Suffering provides several key benefits:

·+10 to all defensive stats

·+4 Prayer bonus

·Ability to store recoil charges

·Automatic damage reflection when charged

Its upgraded version, the Ring of Suffering (i), is particularly valuable. This imbued variant doubles the defensive bonuses of the ring, making it an excellent choice for tank roles and extended boss fights.

The ring also eliminates the need to constantly replace Rings of Recoil. Instead of breaking after reflecting damage, the Ring of Suffering stores charges internally, making it far more efficient for long PvM trips.

Step 1: Complete Monkey Madness II

Before you can craft the Ring of Suffering, you must complete the Grandmaster quest Monkey Madness II. This quest is a major milestone in OSRS progression and unlocks access to Demonic Gorillas, which are the primary source of Zenyte shards.

Monkey Madness II has several demanding requirements, including high combat stats and completion of multiple prerequisite quests. The quest itself involves challenging battles and mechanics, so bringing strong gear and supplies is highly recommended.

Completing this quest is essential not only for crafting Zenyte jewelry but also for accessing one of the most profitable monster farming methods in the game.

Step 2: Obtain a Zenyte Shard

The most important component required to craft the Ring of Suffering is the Zenyte shard. These shards are dropped by Demonic Gorillas, which become accessible after finishing Monkey Madness II.

However, Zenyte shards are relatively rare drops, meaning you may need to defeat many gorillas before obtaining one. Efficient combat setups with serious damage output can significantly improve your farming speed.

For players who prefer to skip the grind, another option is purchasing a Zenyte shard directly from the Grand Exchange using accumulated OSRS gold. Many players earn gold through bossing, skilling, or flipping items before choosing to buy OSRS items like Zenyte shards to save time.

Step 3: Craft a Zenyte Ring

Once you have obtained a Zenyte shard, the next step is crafting the base Zenyte ring.

To create it, you will need:

·1 Zenyte shard

·1 Gold bar

·A furnace

·89 Crafting (or 87 with a +2 boost)

Simply use the Zenyte shard on a furnace while carrying a gold bar to create the unenchanted Zenyte ring.

If you do not have the required Crafting level, you can temporarily boost using a Spicy Stew, although this method is somewhat unreliable due to its random stat boosts. Alternatively, some players ask trusted friends or clan members to craft the ring for them.

Crafting Zenyte jewelry can be expensive, which is why many players gather additional OSRS gold before starting the process.

Step 4: Enchant the Zenyte Ring

After crafting the Zenyte ring, the next step is enchanting it into the Ring of Suffering.

This requires:

·Level 93 Magic

·Enchant Level 7 Jewelry spell

·20 Soul runes

·20 Blood runes

·1 Cosmic rune

Casting the enchantment spell on the Zenyte ring will transform it into the Ring of Suffering.

Training Magic to level 93 can be time-consuming, but methods such as bursting Slayer tasks, high-level alchemy, and combat training can speed up the process. Many players also invest their OSRS gold into efficient Magic training methods to reach this requirement faster.

Step 5: Charge the Ring of Suffering

The Ring of Suffering must be charged with Rings of Recoil to activate its damage reflection ability.

Each Ring of Recoil provides 40 recoil charges, and the Ring of Suffering can store up to 100,000 charges, equivalent to 2,500 Rings of Recoil.

Charging the ring is simple:

1. Right-click the Ring of Suffering

2. Select “Check.”

3. Use Rings of Recoil on the ring

Once charged, the ring automatically reflects damage without breaking. This feature makes it extremely useful for long bossing sessions where inventory space and supply management are critical.

Optional Step: Imbue the Ring

To unlock the full potential of the ring, most players choose to imbue it, creating the Ring of Suffering (i).

Imbuing doubles the ring’s defensive bonuses and significantly increases its overall effectiveness.

You can imbue the ring through two main activities:

·Nightmare Zone

·Soul Wars

Nightmare Zone is generally considered the more AFK-friendly option, while Soul Wars can provide faster points depending on your playstyle.

Best Situations to Use the Ring of Suffering

The Ring of Suffering shines in situations where defense and recoil damage are valuable. It is commonly used in activities such as:

·Zulrah boss fights

·God Wars Dungeon tank roles

·Wilderness bossing

·Extended PvM encounters

Because it stores recoil charges internally, the ring greatly reduces inventory clutter while providing consistent passive damage.

Many players consider it one of the most practical defensive accessories in the game, especially when combined with other high-end gear.

Is the Ring of Suffering Worth the Investment?

The Ring of Suffering is typically one of the more expensive Zenyte jewelry pieces. Farming Demonic Gorillas, leveling Crafting and Magic, and acquiring recoil rings can require significant time and resources.

For players with limited time, building up OSRS gold through bossing, skilling, or trading can be the fastest way to obtain the necessary materials. Some players even choose to buy OSRS items like Zenyte shards directly from the Grand Exchange to speed up their progression.

Despite the upfront cost, the ring quickly pays for itself through improved survivability, reduced supply usage, and greater efficiency during boss fights.

Final Thoughts

Obtaining the Ring of Suffering in Old School RuneScape requires dedication and planning. From completing Monkey Madness II to farming a Zenyte shard, crafting the ring, enchanting it, and charging it properly, the process involves several steps.

However, the reward is well worth the effort. With its exceptional defensive bonuses, built-in recoil storage, and strong synergy with high-level PvM content, the Ring of Suffering remains one of the most valuable accessories in the game.

If you are serious about tackling bosses like Zulrah or taking on challenging PvM content, the Ring of Suffering is an item that deserves a place in your gear setup.
Old School RuneScape:How to Reach the Giant Foundry

The Giant Foundry is a key mini-game in Old School RuneScape that players use to efficiently train their Blacksmithing skill. Not only does it offer substantial experience gains, but it also provides unique rewards that benefit players seeking to craft powerful gear. This guide will walk you through the best ways to get to the Giant Foundry and tips for making the most of your time there.

Situated in Gielinor, the Giant Foundry is a specialized area where players smelt ores and forge items using a unique furnace system. Progressing here helps players level Blacksmithing quickly and grants access to exclusive items and crafting opportunities.Buy OSRS gold with RSgoldfast and conquer new challenges!

How to Get to the Giant Foundry

Here are several reliable methods to reach the Foundry efficiently:

1.Group Teleport

If you’re in a group with friends or clanmates already at the Foundry, you can teleport directly to them using the Group Teleport feature. This is a fast and social way to arrive without traveling on foot.

2.Amulet of Glory

Teleport to Al Kharid Palace via the Amulet of Glory, then walk a short distance to the Foundry. This is a straightforward route, especially if you’ve completed quests like Dragon Slayer, allowing safe and easy travel.

3.Dueling Teleport Ring

Use the Dueling Ring to teleport to the PvP Arena, which is near the Giant Foundry. From there, it’s a quick walk, making this a convenient option for players who already frequent the arena.

4.Gnomish Glider Network

After unlocking the Gnomish Glider, you can fly to Kar-Hewo. The Foundry is nearby, and this scenic route offers a chance to enjoy more of Gielinor landscape on your way.

5.Travel from Lumbridge

For new players or those preferring a classic approach, starting at Lumbridge and heading east through the toll gate leads you directly toward the Foundry. Though slower, it allows you to explore and learn the surrounding area.

Tips for Making the Most of the Giant Foundry

Learn the Mini-Game Mechanics:Understanding how to efficiently smelt and forge will speed up your experience gains.

Use Available Resources:Take advantage of the ores, tools, and equipment provided to optimize your crafting.From beginners to experts, everyone needs buy RS gold – shop with RSgoldfast today!

Join a Community:Engaging with clans or forums can provide helpful advice and make the experience more enjoyable.

Set Goals:Track your progress and set targets to stay motivated during training sessions.

Remember to Take Breaks:Avoid burnout by pacing yourself and taking regular breaks.

Getting to the Giant Foundry is simple with multiple transport options, and once there, you’ll find an engaging way to advance your Blacksmithing. Whether you choose teleportation shortcuts or a scenic journey, the Foundry offers valuable rewards and an excellent training environment for all OSRS players.

OSRS King Ransom Quest: Essential Items Guide

The King Ransom quest in Old School RuneScape is a significant milestone for players aiming to improve their melee combat capabilities. Completing this quest grants access to the powerful Piety prayer, which provides substantial combat boosts. To ensure a smooth experience, players should gather all required items before embarking on this adventure.Don’t let gold grinding slow you down – get OSRS gold instantly at unbeatable prices, only at RSgoldfast!

Quest Overview

The King Ransom quest follows the player’s efforts to rescue King Arthur, who has been captured by the Black Knights. Along the way, players will navigate through investigations, puzzles, and battles, all culminating in the opportunity to unlock the Piety prayer.

Below is a comprehensive list of the essential items required to complete King Ransom efficiently:

Required Items

1.Granite (Any Size)

    Obtained by mining granite rocks in the Desert Quarry.

    Any size of granite is acceptable.

    This item plays a crucial role in the quest progression.

    2.Telekinetic Grab Runes (1 Law, 1 Air)

      Required to cast the Telekinetic Grab spell.

      Essential for retrieving specific quest items remotely.

      Runes can be purchased, crafted, or obtained from monster drops.

      3.Full Black Armor Set

        Includes:

        Black Helmet

        Black Platebody

        Black Platelegs/Skirt

        Trimmed versions are acceptable, but the heraldic (h) variant will not work.

        Necessary for disguising during the quest.

        4.Bronze Med Helm

          Can be purchased from various armor shops.

          May also be obtained through monster drops.

          Required for part of the quest armor requirements.

          5.Iron Chainbody

            A common armor piece found in many general stores.

            Players can also smith this item if they have the required level.

            Needed for disguising in the Black Knights Fortress segment of the quest.

            6.Living Stone Scroll

              Acquired during the quest.

              Plays a crucial role in advancing the storyline.

              Ensure you keep this item safe once obtained.

              Preparation Tips

              Combat Readiness: Be prepared for fights against various enemies, including high-level Black Knights. Bring appropriate weapons, armor, and food.

              Inventory Management: Ensure you have enough space for quest items and essential supplies.

              Teleport Options: Bring teleports for quick travel, such as Camelot Teleports and Fairy Rings (code CJR).

              Stock Up on Food & Potions: Healing items like sharks or Saradomin brews are recommended for tough encounters.

              Check Quest Prerequisites: Make sure you’ve completed Merlin Crystal and Holy Grail before starting.

              The King Ransom quest is an essential challenge for OSRS players looking to unlock the Piety prayer and deepen their engagement with Gielinor’s lore. By gathering the required items—including granite, runes, black armor, a bronze med helm, an iron chainbody, and the living stone scroll—players can ensure a seamless questing experience.At RSgoldfast, we provide reliable, fast buy Runescape gold at unbeatable prices. Join thousands of satisfied players and improve your gaming experience today!

              The King Ransom quest is an essential adventure for any OSRS player looking to improve their melee combat capabilities. By gathering the required items—granite, runes, black armor, a bronze band helmet, an iron chain body, and a living stone scroll—players will be well-equipped to tackle the challenges that lie ahead. Completing this quest not only unlocks the powerful Piety prayer but also deepens players engagement with the rich lore and storytelling of Old School RuneScape. Prepare well, and soon you’ll be reaping the benefits of Piety and the rewards that come with completing this iconic OSRS quest!

              Fast Cash in OSRS: Earning 20M Per Hour with Minimal Effort

              Old School RuneScape (OSRS) has long been a game where achieving wealth often requires significant time and effort. Bossing, high-level skilling, and other traditional money-making methods can be daunting for players who don’t have max stats or the time to grind. However, what if you could earn significant OSRS gold with little effort and without requiring a high-level account? Well, there’s a method for free-to-play (F2P) players that could have you raking in up to 20 million GP per hour with minimal requirements. And no, this isn’t some shady exploit — it’s a legitimate gold-making trick you can use on multiple accounts.

              The Basics: How It Works

              This method revolves around utilizing multiple accounts and a specific in-game item that you can grab for easy profit. The key to this method is maximizing your GP per hour through repetition on multiple accounts. Let’s break down how you can set this up.

              Step 1: Creating Multiple Accounts

              The first step in this method is creating multiple free-to-play OSRS Accounts. The more accounts you have, the higher your earnings. Since the technique relies on doing the same task repeatedly on each account, the more accounts you operate, the greater your potential gold per hour (GP/h).

              A good number of accounts to start with is around 20. While this sounds like a lot, remember that you can easily manage several accounts at once if you use a few tools to speed up your gameplay, such as tabbing between accounts on your computer or using a simple multi-account manager. The time you invest in creating and setting up these accounts will pay off in the long run.

              Step 2: Achieving the Requirements

              This method isn’t as labor-intensive as some bossing strategies. To start, you’ll need to meet a few basic requirements:

              • 33 Magic: This is the minimum Magic level needed to use Telekinetic Grab, the spell that you’ll rely on to collect the key items in this method.
              • Total level of 500: This is the total of all your account’s skill levels. Reaching level 500 is fairly easy and can be achieved in less than a day for most players. A combination of basic skills such as Woodcutting, Fishing, and Crafting will get you there quickly.

              Once your account has both of these requirements, you’re ready to start. These requirements are pretty low, which is ideal for free-to-play accounts and beginners who want to jump into money-making without much hassle.

              Step 3: Gear Up for Success

              Now that your account is ready, it’s time to gear up. The following gear is all you’ll need to complete this method:

              • Air Staff: This staff will allow you to cast the Telekinetic Grab spell without the need for runes, which is a huge cost-saver.
              • Zamorak Robe Top and Zamorak Robe Bottom: These items are cheap to obtain and will provide you with some protection as you act. They are also helpful for maximizing your chance of success in the method.

              With this gear, you’ll be able to teleport efficiently and grab the items needed for the method.

              Step 4: Travel to the Chaos Temple

              The next part of the method is traveling to the Chaos Temple. This temple is located north of Falador, and it’s a crucial step in the process.

              To get there:

              1. Teleport to Falador: Use your standard teleportation method to reach Falador. If you don’t have teleport access, you can also use the Lumbridge teleport and walk to the temple from there.
              2. Run north: From Falador, run north to reach the Chaos Temple. This is a fairly short run, so you won’t waste much time traveling.

              Step 5: Telekinetic Grab for Wines of Zamorak

              Once you arrive at the Chaos Temple, it’s time to grab the key items — the Wines of Zamorak. There are two locations in the temple where you can grab these wines:

              • Downstairs: One Wine of Zamorak is located downstairs in the Chaos Temple. This is the most accessible spot, and it’s the first one you’ll grab.
              • Upstairs: The second Wine of Zamorak is located upstairs. This location requires a total level of 500 to access, but since you’ve already met that requirement, it’ll be no problem.

              To grab the wines, you’ll use the Telekinetic Grab spell. Simply cast it on the wine bottles, and they will be teleported directly into your inventory. A full inventory of wines is all you need before you can head back to the bank.

              Step 6: Banking and Repeating

              Once you’ve filled your inventory with Wines of Zamorak, it’s time to teleport back to Falador and bank your loot. The easiest way to do this is by using the Falador teleport to quickly return to the bank.

              After banking your loot, it’s time to head back to the Chaos Temple to repeat the process. If you have around 20 accounts running this method, you can consistently farm the Wines of Zamorak and sell them for a decent profit.

              Profit Breakdown

              The value of Wines of Zamorak can fluctuate, but on average, they sell for around 10,000 GP each. A full inventory of 28 wines can net you around 280,000 GP.

              If you’re operating 20 accounts at once, you can expect to farm up to 5 full inventories per hour per account. This means you could potentially earn:

              • 5 inventories x 20 accounts = 100 inventories per hour
              • 100 inventories x 280,000 GP = 28,000,000 GP per hour

              This is the potential earning power of this method. If you’re consistently farming and managing 20 accounts, you can easily earn 20 million GP per hour, or possibly even more, depending on the speed of your account switching and the current market price for the wines or get cheap RuneScape gold from RSorder.

              Tips for Maximizing Your Earnings

              • Account Management: To run multiple accounts efficiently, use multi-account management tools. These can help you switch between accounts faster and maintain good performance.
              • Banking Efficiency: The faster you bank, the more efficient your method will be. Use the quickest teleport methods and make sure your accounts have enough runes to avoid delays.
              • Timing: This method works best during off-peak hours when the market price for Wines of Zamorak is high and competition for the items is lower.

              Conclusion: Easy and Efficient Free-to-Play Money

              This method is an excellent way to make easy money for free-to-play accounts without requiring high stats or long hours of grinding. By creating multiple accounts and using the Telekinetic Grab spell to collect Wines of Zamorak, you can quickly and efficiently earn up to 20 million GP per hour. It’s an excellent option for newer players or those looking to make some quick cash without diving into complex bossing or expensive skilling. So why not give it a try? The more accounts you run, the more gold you’ll make!

              Old School RuneScape: How To Kill Vorkath

              Vorkath is one of the most formidable bosses in Old School RuneScape (OSRS), known for its high damage output, challenging mechanics, and rewarding loot. As a high-level PvM (Player vs. Monster) boss, Vorkath is a rite of passage for many players, often considered a key milestone in an OSRS player’s journey. If you’re aiming to defeat Vorkath, whether for profit, achievement, or progression, you’re in the right place. In this guide, we’ll break down everything you need to know about how to kill Vorkath in OSRS.

              Understanding Vorkath

              Vorkath is a dragon-like creature located in the Vorkath’s Lair, a location accessible via the Kourend region, specifically in the Zeah area. It is a challenging boss with several unique mechanics, and while it may seem daunting at first, with the right preparation and strategy, you can defeat Vorkath with ease.

              Vorkath drops a variety of OSRS gold, including the Vorkath’s head, which is required to obtain the Dragon Slayer II quest reward, and other valuable drops like blue dragonhide, coins, herb boxes, and dragon bones. For many players, this makes Vorkath a lucrative boss to kill, alongside the challenge it presents.

              Requirements to Fight Vorkath

              Before taking on Vorkath, you’ll need to meet several requirements:

              Completion of Dragon Slayer II – This is essential as it grants access to Vorkath’s lair.

              High Combat Stats – You should have strong combat stats, with the following as a guideline:

              70 Ranged (to use high-tier ranged weapons effectively).

              70 Defence (to withstand hits from Vorkath).

              70 Prayer (to use Protection Prayers and other prayers).

              70 Hitpoints (for survivability).

              Good gear – You need high-level gear suited for damage dealing and tanking Vorkath’s hits.

              Recommended inventory – Potions, food, and other essentials are necessary for a successful kill.

              How to Get to Vorkath

              To get to Vorkath, you must first complete the Dragon Slayer II quest. After completing the quest, you can enter the lair by using a shortcut in the Zeah region, which is accessible by the Kourend Castle.

              The entrance is located in the Vorkath’s lair after passing through a cave. To reach this, you will need to use a Kourend teleport or travel by boat from Port Piscarilius.

              Once you’re in the lair, you will face Vorkath in the center of the area.

              Recommended Gear Setup

              Since Vorkath is a high-level boss, you’ll want to bring the best gear possible. Your gear should be focused on maximizing damage, survival, and defense. Here’s a recommended setup for both Ranged and Melee combat:

              Ranged Setup (most common)

              Ranged is the most effective combat style to use when fighting Vorkath because of its high accuracy and powerful special attacks. Here’s a suggested gear setup:

              Weapon: Blowpipe (Toxic) or Armadyl Crossbow with Ranging Ammo (e.g., Rune arrows or Amethyst darts).

              Helmet: Karil’s crossbow or Armadyl helmet (preferably Karil’s crossbow for higher DPS).

              Body: Karil’s crossbow (again, for the powerful range bonus).

              Legs: Karil’s crossbow or Armadyl.

              Boots: Pegasian boots (excellent for boosting your Ranged damage).

              Gloves: Barrows gloves (best all-around).

              Cape: Ava’s device or Fire cape for better defense.

              Amulet: Amulet of the void for boosting your stats.

              Understanding Vorkath’s Attack Patterns

              Vorkath has several attacks that require quick thinking and understanding of its attack patterns. Below are some of the key attack methods Vorkath uses:

              Regular Ranged Attacks – Vorkath uses a standard ranged attack in which he shoots a blue projectile. The damage from this attack can be mitigated by using Protect from Missiles (Ranged prayer) or by standing behind cover.

              Fireball Attack – Vorkath will occasionally charge a large green fireball. If this fireball hits you directly, it will deal massive damage. You must avoid this by moving out of the way. This attack can be telegraphed as Vorkath will charge up for a moment before launching the attack.

              Poison Attacks – Vorkath will also occasionally shoot a poison-based attack. The damage over time from poison can be substantial, but it can be cured with Antipoison potions or Serum potions.

              ZGS Special Attack – This attack involves Vorkath using a special red line, attempting to hit you directly with a massive attack. You should always Pray for protection at this stage.

              Fighting Strategy: How to Kill Vorkath

              To kill Vorkath efficiently, you must carefully manage the boss’s mechanics. Here is the recommended strategy:

              Start with Prayer: Use the Protect from Missiles prayer to reduce the damage from Vorkath’s ranged attacks.

              Stand Behind Obstacles: Vorkath will often fire projectiles at you. To avoid these attacks, stand behind obstacles located in the lair. Use these obstacles to shield yourself from incoming projectiles.

              Avoid Fireball Attacks: When Vorkath charges up a green fireball, immediately move away from the targeted area to dodge the attack. If hit, the fireball will deal substantial damage, so avoiding this attack is critical.

              Use the Right Potions: Bring a combination of Prayer potions, Super restore potions, Antipoison, and Serum potions to deal with poison and ensure that you can keep up your combat stats throughout the fight.

              Be Mindful of Poison: Vorkath uses poison-based attacks, which deal significant damage over time. Ensure you have Antipoison potions to keep yourself safe from this damage. When poisoned, your health will constantly decrease until you use the antidote.

              Use Melee (optional) – If you prefer, you can try using melee for a closer combat approach. However, Ranged is generally preferred because it allows you to stay out of Vorkath’s range and avoid getting hit by dangerous attacks like fireballs.

              Final Tips and Tricks

              Food: Always bring plenty of high-healing food, such as Sharks or Karambwan. These will help keep you alive in case you take unexpected damage from Vorkath’s special attacks.

              Practice the Mechanics: Vorkath can be difficult for new players, so it’s important to practice the attack patterns and get used to dodging the fireball attacks. Once you become familiar with the fight, you will have fewer close calls.

              Efficient Movement: Always be moving during the fight. Staying in one spot will increase the risk of getting hit by Vorkath’s ranged or fireball attacks.

              Potions: Don’t neglect your potions, as they are key to staying alive. Prayer potions will help you maintain your defensive prayers, and Super restore potions will keep your stats up during the battle.

              Conclusion

              Killing Vorkath in cheap RS gold can be a challenging yet rewarding experience. With the right gear, strategy, and preparation, you can take down this mighty boss and reap the rewards of its valuable drops. Remember to stay calm, avoid its deadly fireball attacks, and manage your resources wisely. As you gain more experience, Vorkath will become more manageable, and you’ll be able to kill him more efficiently. Whether you’re after loot, achievement, or simply the thrill of a tough boss fight, defeating Vorkath is an impressive accomplishment in OSRS.