Old School RuneScape: Beginner’s Guide – Tips & Tricks

Old School RuneScape (OSRS) is a classic MMORPG that has captured the hearts of millions with its nostalgic charm and deep gameplay. For new players, the game can seem daunting at first, with its vast world, intricate systems, and minimal hand-holding. But don’t worry—this guide will walk you through essential tips and tricks to help you start your journey in Gielinor.

From mastering the basics to understanding the economy and gameplay mechanics, this beginner’s guide is your ultimate companion for making the most out of your OSRS experience.

1. Complete the Tutorial Island

Your journey begins on Tutorial Island, where you’ll learn the basics of the game, such as movement, combat, and skilling. Pay attention to the instructions given by NPCs, as they will provide foundational knowledge about how OSRS gold works.

Key Points to Remember:

You’ll choose between Ironman, Hardcore Ironman, or standard accounts. Choose standard unless you’re ready for extra challenges.

Use this time to familiarize yourself with the user interface and controls.

2. Understand the Combat Triangle

OSRS employs a combat triangle that determines the strengths and weaknesses of different combat styles:

Melee beats Ranged.

Ranged beats Magic.

Magic beats Melee.

Tips:

Train all three combat styles to be versatile.

Start with melee combat, as it’s the easiest and cheapest to train early on.

Equip the best armor and weapons available for your level to increase combat efficiency.

3. Prioritize Key Quests

Quests in OSRS provide experience, unlock new areas, and grant valuable rewards. For beginners, completing the right quests can give you a significant head start.

Recommended Quests:

Cook’s Assistant: Unlocks the ability to bake your first pie.

The Knight’s Sword: Provides a large Smithing XP boost.

Waterfall Quest: Grants a huge boost to Attack and Strength.

Vampyre Slayer: Gives a strong boost to Attack.

Tree Gnome Village: Grants Attack XP and unlocks a transportation network.

Tips:

Use quest guides from the OSRS Wiki to make quests easier to navigate.

Focus on quests that provide early-game XP rewards in skills you want to train.

4. Train Essential Skills

In OSRS, there are a variety of skills to train, categorized into Combat, Gathering, and Artisan skills. As a beginner, focus on skills that offer utility and open up new opportunities.

Recommended Skills:

Fishing and Cooking: Provide a reliable source of food for combat.

Mining and Smithing: Allow you to create your own armor and weapons.

Woodcutting and Firemaking: Easy to train and essential for quests like Wintertodt (members only).

Prayer: Provides combat buffs. Train by burying bones dropped by enemies.

Tips:

Train multiple skills simultaneously to keep the gameplay engaging.

Use free-to-play (F2P) training methods unless you’re a member.

5. Make Use of the Grand Exchange

The Grand Exchange (GE) is OSRS’s central marketplace, where players buy and sell items. It’s located in Varrock and becomes available after completing a short tutorial.

How to Use the GE:

Sell items you don’t need, such as monster drops or skilling products.

Buy better gear and supplies to make combat and skilling more efficient.

Tips:

Check the market prices of items to avoid overpaying or underselling.

Use the GE to stock up on essential items like food, runes, or tools.

6. Money-Making for Beginners

Earning gold is crucial in OSRS, as it allows you to buy better equipment and supplies. As a beginner, focus on simple money-making methods that don’t require high skill levels.

Early Money-Making Methods:

Killing Chickens or Cows: Collect feathers, raw meat, or cowhides and sell them at the GE.

Mining Clay: Clay sells well and is easy to mine.

Fishing Shrimp or Lobsters: Fish and sell them for profit.

Collecting Runes or Bones: Dropped by enemies like goblins or hill giants.

Tips:

Prioritize gathering materials with consistent demand in the GE.

Avoid gambling with risky methods like staking in the Duel Arena early on.

7. Explore Transportation Options

OSRS features a variety of transportation methods to navigate the vast world of Gielinor. Learning these methods will save you time and improve efficiency.

Basic Transportation Options:

Lumbridge Home Teleport: Free spell to teleport to Lumbridge.

Varrock, Falador, and Lumbridge Teleports: Unlocked via Magic training.

Spirit Trees (Members): Accessible after completing certain quests like Tree Gnome Village.

Amulets of Glory and Rings of Dueling: Teleport items available in the GE.

Tips:

Unlock as many teleport locations as possible for faster travel.

Use energy-restoring items like stamina potions to reduce downtime.

8. Join the Community

One of OSRS’s greatest strengths is its active and friendly community. Interacting with other players can make your experience more enjoyable and provide valuable tips.

How to Get Involved:

Join a Clan Chat: Find a community of like-minded players to share advice and group activities.

Participate in Events: Seasonal events offer unique rewards and fun experiences.

Ask for Help: Most players are happy to assist beginners with questions or guidance.

Tips:

Use the official OSRS forums or subreddit to find clans and tips.

Avoid scams by being cautious when trading with other players.

9. Learn How to Stay Safe

Since OSRS has a player-driven economy and competitive elements, there’s always a risk of scams or being lured into dangerous situations.

Safety Tips:

Never share your account details with anyone.

Avoid trading in suspicious circumstances or accepting “too good to be true” offers.

Familiarize yourself with PvP mechanics to avoid getting lured into dangerous areas.

10. Upgrade to Membership (Optional)

While OSRS is free to play, becoming a member unlocks additional skills, quests, areas, and items. Membership greatly expands the game’s content and allows for more efficient training methods.

Benefits of Membership:

Access to exclusive skills like Agility, Thieving, and Farming.

Explore new areas like Zeah, Morytania, and Fossil Island.

Train using member-exclusive methods like Blast Furnace and Wintertodt.

Tips:

Consider purchasing membership with in-game gold via Bonds.

Start with F2P content to ensure you enjoy the game before upgrading.

11. Set Long-Term Goals

OSRS is a game that rewards planning and persistence. As you progress, set goals to keep yourself motivated and focused.

Examples of Goals:

Achieving high levels in your favorite skills.

Earning enough gold to buy a rare item like a Dragon Scimitar.

Completing challenging quests like Monkey Madness or Desert Treasure.

Participating in boss fights or group activities like Raids.

Tips:

Break large goals into smaller, manageable tasks.

Don’t rush—enjoy the journey and explore the world of Gielinor.

12. Utilize Helpful Tools and Resources

Many third-party tools and resources can enhance your OSRS experience. These tools provide valuable information, such as quest guides, skill calculators, and price trackers.

Recommended Tools:

OSRS Wiki: Comprehensive resource for quests, skills, and game mechanics.

RuneLite: A third-party client with helpful plugins for training and efficiency.

Skill Calculators: Estimate the XP and materials needed to reach your goals.

Tips:

Stick to tools approved by Jagex to avoid account bans.

Experiment with plugins in RuneLite to optimize your gameplay.

Conclusion

Old School RuneScape is a rich and rewarding game that offers endless adventures for players willing to learn and explore. By following the tips and tricks in this guide, you’ll build a strong foundation for success and enjoy the game to its fullest. Remember to be patient, set achievable goals, and have fun as you embark on your journey through Gielinor.

Good luck, adventurer, and may your path be filled with glory and cheap RS gold!
Making Millions in OSRS: Wilderness Bossing on a Budget

In today’s adventure, I’m going to show you how to get rich bossing in the Wilderness without needing a massive bankroll. This guide is especially for players who want to dip into bossing with minimal gear and no initial capital. That’s right—we’re starting from zero coins and working our way up through the dangerous, thrilling terrain of the Wilderness bosses (also known as “wily” bosses) to stack up OSRS gold.

The Challenge: Bossing with No Gear

I started with a bit of gear and a few million GP, today, I’m kicking things off with nothing but my fists! Literally. My bank tab is empty, and my inventory is completely void of any useful items. I’ll claw my way to the top through sheer determination, starting with no items, coins, or equipment.

However, as we progress and reach key GP milestones, I’ll be unlocking certain untradeables like the Salve amulet and Dragon Defender. My main stats—84 attacks and 93 strength—will be crucial in carrying me through the initial boss fights.

Bosses on the Menu: Ve’natis, Callisto, and More

The Wilderness bosses I’ll be tackling are some of my all-time favorites: Ve’natis, Callisto, Spindel, and others. These bosses are notorious for dropping pieces of the highly coveted Voidwaker, a powerful special attack weapon that can net you massive profits. We’re aiming for consistent kills, good loot, and staying one step ahead of the PKers (Player Killers) who are bound to try and make our lives difficult.

First Attempt: Kicking Callisto

We kick things off (pun intended) by trying to kill Callisto, an intimidating bear boss who is too weak to crush attacks. Since I’m unarmed, my punches count as crush attacks, and I figure I might as well give it a shot.

I barely get into the fight before I spot the first PKer of the day. Luckily, with zero risk on me, I managed to survive and make my way back out there. The problem with these early attempts is time—not the risk. The wilderness is a lawless place where time can be your biggest enemy when PKers show up, but persistence is key.

My third attempt went smoother, with me finally managing to deal consistent damage, but things got dicey in the second phase. With quick thinking, I teleported out to the Ferox Enclave, healed up, and returned to finish off the fight. The reward? Oak planks and super restores—exactly the kind of loot we need to get the ball rolling.

Building Up the Budget: Getting that First 100k GP

With my newfound wealth of 100k, I immediately reinvested it into better gear. I grabbed a leaf-bladed battle axe for around 60k, which is an excellent weapon against Callisto, and a ring of dueling for quick teleports back to safety. After equipping the axe, my next kill went a lot smoother, yielding 131k GP in profit! That cash gave me a chance to buy dragonhide armor, rune boots, and a few other upgrades to increase my survivability and DPS.

Now, equipped with better gear, I’m pulling off two kills per trip, which is a huge boost to efficiency. Banking more frequently might slow down kills-per-hour slightly, but the early stages are all about stacking up that GP and upgrading your gear while minimizing risk.

RNG on My Side: The Voidwaker Blade

The breakthrough moment came when I landed a 20M GP Voidwaker blade drop. This insanely lucky drop skyrocketed my budget and allowed me to skip over intermediate upgrades like the zombie axe, which I had initially planned to purchase. Instead, I went straight for the Ursine chainmace.

The Ursine chainmace is a beast of a weapon, especially in the Wilderness, where it gets a 50% accuracy and damage bonus. It’s a bit pricier to use since it requires Revenant Ether to charge, but the damage output is well worth the investment. With this upgrade, I started slicing through bosses like Callisto and Ve’natis with ease.

PKers and How to Handle Them

When you’re bossing in the Wilderness, PKers are an unavoidable reality. They can appear out of nowhere, and one mistake could cost you a lot of time—and sometimes, significant GP. However, with some strategic thinking and preparation, you can minimize your losses.

My go-to teleport is the Royal Seed pod, which works up to level 30 Wilderness and is a one-click teleport that can save you in sticky situations. Having it equipped as an emergency escape is essential, but sometimes running from PKers is also a valid strategy, especially if they are trying to entangle or freeze you.

Most of the time, the PKers aren’t in massive teams, and if you’re quick on your feet (or clicks), you can get away without too much hassle. Still, getting PKed is part of the process—sometimes you’ll get unlucky and lose a few hundred thousand GP, but in the long run, the rewards from bossing will outweigh those losses.

The Big Milestones: Salv Amulet Unlocked and 85 Attack

Once my GP stack hit the 1M mark, I unlocked the Salv amulet, which is essential for bossing undead enemies like Ve’natis and Callisto. With a 20% boost to accuracy and strength, it makes a huge difference in kill times. Shortly after, I hit an 85 attack, which opened up even more efficiency in my bossing trips.

Day Two: More Kills, More Loot

Day two was all about consistency. After unlocking the Ursine chainmace, I focused on getting as many kills as possible while avoiding PKers. The drops continued to be lucrative, and the occasional Onyx bolt tips or Snapdragons kept the GP flowing. By the end of day two, my total tab was sitting at nearly 23M GP.

The biggest challenge at this stage wasn’t the bosses—it was keeping up the momentum while dodging PKers. At one point, I had to escape a team of four PKers who just barely missed their Teleblock at the last second. Escaping those situations feels like a mini-victory in itself!

The Second Voidwaker Blade: Even More GP!

On day three, I landed another Voidwaker blade. That’s right—my second big-ticket drop in the same series of bossing! Selling it for another 20M GP gave me the capital to buy a Dragon Warhammer, a powerful special attack weapon that can reduce an enemy’s defense significantly. With this new gear, I was ready to tackle even more challenging bosses, like Ve’natis in multi-combat zones.

Conclusion: From Zero to 50M GP

By the end of day four, after countless boss kills, PKer encounters, and some seriously lucky drops, my tab had surpassed 50M GP. Starting from nothing and working my way up in the Wilderness has been a wild, unpredictable ride, but it shows that you don’t need a massive starting budget to make serious money in Old School RuneScape.

Whether you’re punching bosses with zero gear or rolling in millions of RuneScape gold, the Wilderness is always a high-risk, high-reward playground. If you’re ready to take on the challenge, remember to bank frequently, avoid the PKers, and most importantly, have fun!

Good luck, and may your RNG be as good as mine!

OSRS Kudos Guide: Earn Recognition and Rewards

In the vast world of Old School RuneScape (OSRS), Kudos play a crucial role in unlocking new content and gaining recognition for your achievements. If you’re wondering how to earn Kudos, look no further. This guide will walk you through various activities and quests where you can accumulate Kudos and enhance your gaming experience.

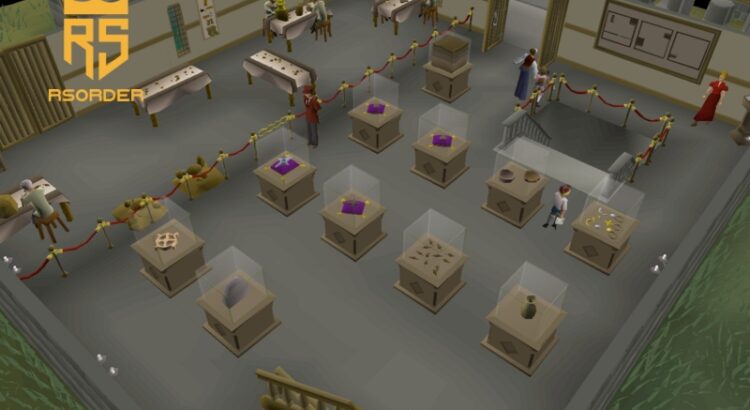
The Varrock Museum: A Haven of Kudos

To embark on your Kudos quest, make your way to the Varrock Museum nestled in the heart of Varrock. Begin by conversing with Curator Haig Halen, who will set you on your path to glory. The museum offers a plethora of opportunities to earn Kudos, and here’s how:

Cleaning Finds: Display Case and Dig Site

The Dig Site: Unleash your inner archaeologist by participating in the Dig Site quest, granting you access to the dig site itself. Here, you can meticulously clean ancient artifacts, unearthing their hidden secrets while earning Kudos for your efforts.
Display Case: Descend into the museum’s basement, where you’ll find an array of artifacts waiting to be cleaned and displayed. By showcasing your attention to detail and patience, you can amass additional Kudos. Complete the display cases to leave a lasting mark on the museum’s legacy.

Questing for Kudos

Embarking on various quests across OSRS can prove immensely rewarding in terms of Kudos. Here are some notable quests that offer Kudos as a reward:

The Dig Site: This quest not only grants you access to the dig site but also provides a substantial boost to your Kudos count, propelling you closer to your ultimate goal.
Bone Voyage: Journey to Fossil Island by completing the Bone Voyage quest. Once there, engage in a multitude of activities that yield additional Kudos, making your expedition all the more worthwhile.
Client of Kourend: By undertaking this quest, you’ll gain access to the Kourend & Kebos Diary. Completing the diary rewards you with Kudos among other benefits, solidifying your reputation in the realm of Kudos seekers.

Exploring Fossil Island

Fossil Island is a veritable paradise for those seeking Kudos. Here are a couple of activities to consider:

Volcanic Mine: Test your mettle in the Volcanic Mine minigame, where your performance directly impacts the number of Kudos you’ll receive. Aim for perfection to maximize your rewards.
Mushroom Forest: Delve into the enchanting Mushroom Forest and unearth buried fossils. Cleaning these ancient remnants will not only grant you Kudos but also provide a sense of accomplishment.

Unleashing Your Potential with Achievements

The Achievement Diaries scattered across Gielinor offer a fantastic opportunity to earn Kudos while completing various tasks. Two noteworthy diaries to pursue are:

Varrock Achievement Diary: By conquering a series of tasks in the Varrock Diary, you’ll not only accumulate Kudos but also gain access to the Varrock Armour, enhancing your overall gaming experience.
Karamja Achievement Diary: Embark on a tropical adventure to Karamja and complete a range of tasks, earning Kudos points along the way. Immerse yourself in the island’s vibrant culture and bask in the glory of your achievements.

Miscellaneous Activities and Miniquests

Beyond the main avenues of Kudos accumulation, numerous miscellaneous activities and miniquests await your discovery. Here are a couple of examples:

Natural History Quiz: Demonstrate your knowledge by completing the natural history quiz in the Varrock Museum. Showcasing your expertise will reward you with Kudos points.
Tears of Guthix: Engage in the Tears of Guthix miniquest, which not only presents a captivating storyline but also grants additional Kudos points as a token of your triumph.
Observatory Quest: Embark on a celestial adventure by completing the Observatory Quest and tackling the intricate star puzzle. Solve it with finesse, and you’ll be rewarded with well-deserved Kudos.

Now armed with this comprehensive guide, you’re ready to embark on your journey to accumulate Kudos in OSRS. Explore the Varrock Museum, conquer quests, uncover treasures on Fossil Island, and conquer achievements to earn recognition and reap the rewards that await. To enhance the gaming experience, in addition to earning Kudos in OSRS, players can also choose to do this by buy OSRS Gold from RSOrder. May your path be filled with adventure and abundant Kudos!