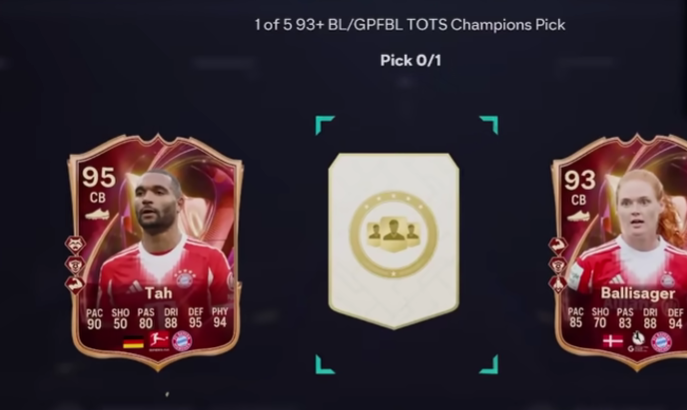
FC 26 Guide: 93+ Bundesliga TOTS Player Picks (Rank 1 Rewards Breakdown)

The 93+ Bundesliga & Frauen Bundesliga TOTS Player Picks are easily some of the most talked-about rewards in FC 26 Ultimate Team right now—and for good reason. To make the most of these picks without draining your resources, you can buy FUT 26 Coins to fund more attempts and secure top-tier players. After analyzing multiple Rank 1 openings, we can break down:

· The best players to target

· The real pack weight trends

· And how to maximize your picks

Best Players You’re Hunting

Let’s be honest—everyone is opening these for a few elite names:

Top Tier (Game-Changers)

· Harry Kane (TOTS) – Elite striker, endgame finisher

· Florian Wirtz (TOTS) – Creative engine, insane dribbling + passing

· Luis Díaz (TOTS) – One of the biggest surprises, explosive winger

· Jonathan Tah (TOTS) – Top-tier CB, insanely common for his value

High-Value Picks

· Joshua Kimmich (TOTS) – ~1.6M coins, massive W pull

· Nico Schlotterbeck (TOTS) – Broken CB, appears a lot 

· Dayot Upamecano (TOTS) – Meta defender, strong presence

· Lena Oberdorf / Pernille Harder (TOTS) – Top-tier women’s cards

Pack Weight Reality (What You ACTUALLY Get)

From the session, the pack weight is VERY telling:

Common Pulls (You’ll See These A LOT)

· Pavlović

· Baumgartner

· García

· Stanway

· Vuskovic

Expect these in nearly every set. They are your “filler” cards.

Mid Tier (Decent but Not Crazy)

· Stiller

· Kobel

· Harder

· Upamecano

Solid value, usable—but not the jackpot.

High Frequency META (Surprisingly Common Ws)

· Schlotterbeck (shows up CONSTANTLY)

· Jonathan Tah (appears way more than expected)

This is why many players are walking away with stacked CB duos.

Rare Elite Pulls

· Kimmich

· Díaz

· Wirtz

· Kane

These are the real jackpot cards—and they are noticeably rare.

Smart Pick Strategy

Opening these blindly is a mistake. Here’s how to play it properly:

1. Avoid Duplicate Traps

If you already have:

· Schlotterbeck

· Don’t pick him again—pivot to value (like Kimmich or Tah)

2. Value > Rating (Most of the Time)

Example:

· Stiller > Stanway (if resale/meta matters)

· Tah > almost any 93-rated fodder

Coins + usability matter more than rating.

3. Build Your Defense First

From these picks alone, you can realistically get:

· Schlotterbeck

· Tah

· Upamecano

That’s an endgame backline from rewards alone

4. Know Your Formation

Example:

· Stanway = DM only

If you don’t use a DM formation, she’s useless. Always pick for your squad—not just hype.

Rank 1 vs Other Picks

Rank 1 (1 of 5 picks)

· Best overall value

· Higher chance at meta players

· More variety

1 of 4 Picks

· Surprisingly inconsistent

· Often worse than 1 of 5

1 of 3 Picks

· Mostly fodder

· Rarely worth relying on

Conclusion: Stick to Rank 1 if you want real rewards.

Key Takeaways

· Bundesliga TOTS picks are CB-heavy 

· Schlotterbeck & Tah are everywhere (huge W)

· Kimmich (~1.6M) is one of the best pulls possible

· Elite attackers (Kane, Wirtz, Díaz) are VERY rare 

· You can build a full meta defense just from rewards 

Final Verdict

These are honestly:

· Better than Premier League TOTS picks in consistency.

· Even when you don’t hit the jackpot, you’re still walking away with:

· High-value defenders

· Usable meta cards

· Strong squad upgrades

To keep building your team without overspending, you can buy cheap EA FC 26 Coins from MMOEXP and unlock even more picks and upgrades with ease.
EA Sports FC 26 – Starters Only Choice Pack Guide (Best Picks, Value & Evo Strategy)

The Starters Only Choice Pack in EA Sports FC 26 is one of the more interesting (and slightly controversial) packs we’ve seen so far. It’s simple on paper—but the real value depends entirely on how well you understand Evolutions (Evos), market pricing, and PlayStyle+ optimization. Whether you grind for rewards or choose to buy FUT 26 Coins to bolster your club, knowing how to evaluate this pack will save you from wasting resources. Let’s break it down properly so you can make the smartest choice possible.

Pack Overview

1. Cost: 

· 300,000 Coins or 500 FC Points

2. Limit: 2 per account

3. Contents: 

· A selection of identical-tier starter players (mostly Evo-focused)

· 5 players rated 86+ guaranteed 

This is not a “luck-heavy” pack—it’s a decision pack. Everyone sees roughly the same pool, meaning your outcome is based on knowledge, not RNG.

Player Pool Breakdown (Who’s Worth It?)

Here’s how the main options stack up based on meta relevance, Evo potential, and current market value:

Lower Priority Picks

· Estevão – Fun in-game, but lacks long-term Evo ceiling

· Cole Palmer – Solid, but not elite-tier value

· Heung-min Son – Already had a strong free version

· Iñaki Williams – Oversupplied, low value for cost

· Caroline Weir Fyfe – Good card, but heavily packed earlier

· Cláudia Pina – Likely already Evo’d by most players

These players are usable—but not optimal for a high-cost pack.

Mid-Tier / Situational Picks

· Franck Ribéry – Strong dribbling + Evo flexibility

· Ricardo Quaresma – Unique playstyle, but niche

· David Ginola – Great all-rounder, but may need future upgrades

These are fine if they fit your squad—but still not the top-tier choice.

The Clear Best Pick

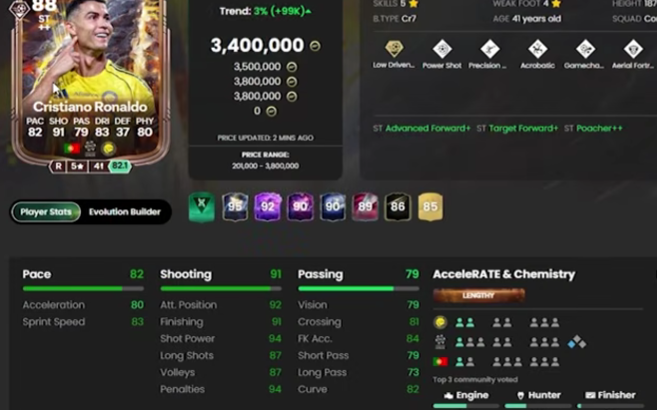
Cristiano Ronaldo (CR7)

· Market Value: ~3.4 million coins

· Why He’s #1: 

o Elite baseline stats

o Massive Evo scaling potential 

o Can stack multiple top-tier PlayStyle+ traits 

Evo Potential Example:

You can realistically build CR7 into a monster with:

· Rapid+

· Quick Step+

· Finesse Shot+

· Low Driven+

That combination is endgame-level, and far beyond what most other cards in this pack can reach.

Verdict: If you open this pack once, CR7 is the automatic pick. No debate.

Alternative High-Value Pick

Lionel Messi

· Market Value: ~480k coins

· Still under pack value, but not as explosive as CR7

Key Insight:

· The version with Dead Ball+ limits flexibility

· Lower-tier versions (like an 86-rated Messi with Tiki-Taka+) can actually be better for Evo stacking 

If you’re thinking long-term:

· Skip flashy versions

· Target versions with better PlayStyle+ synergy 

Market Value & Investment Angle

This pack isn’t just about gameplay—it’s also about coin efficiency:

PlayerApprox ValueVerdict
Cristiano Ronaldo~3.4MMassive profit/value
Lionel Messi~480KDecent, flexible
David Ginola~580KSolid hold
Cláudia Pina~465KAlready peaked
Iñaki Williams~530KOverpriced

 Some cards (like Ginola or Messi) could be “wait investments”—meaning they gain value when new Evos drop.

Should You Open It Twice?

Short answer: Probably not.

Why:

· There’s only one elite-tier outcome (CR7) 

· Most players will already own:

o Pina

o Fyfe

o Iñaki Williams

· Duplicate value drops hard on second attempt

· Unless you’re chasing variety or content—one pack is optimal.

Final Recommendation

· Open once if you can afford it

· Take Cristiano Ronaldo 100% of the time

· Only consider Messi if you want a technical Evo project

· Avoid opening twice unless you’re comfortable wasting coins – though if you’re low on funds, you can buy cheap EA FC 26 Coins from MMOEXP to stretch your budget further.

Pro Tip (Evo Strategy)

· Don’t rush your upgrades.

· Wait for future Evo chains

· Stack PlayStyle+ intelligently

· Avoid locking yourself into weak traits like Dead Ball+

The real value of this pack isn’t the card—it’s what you turn it into. And for the best deals on coins to fuel your Evo projects, MMOEXP has you covered.

MLB The Show 26: Understanding Every Pitching Attribute

In MLB The Show 26, success on the mound often determines the outcome of a game. No matter the mode—Diamond Dynasty, Franchise, or online competition—effective pitching is what keeps opponents from building momentum. While offense may grab attention, it’s your pitching staff that controls tempo, limits damage, and ultimately secures wins.

Each pitcher in the game is defined by a collection of attributes that shape how they perform. These ratings influence pitch speed, accuracy, movement, endurance, and even how well a pitcher handles pressure. Learning what each attribute does—and how to use it—can give you a real competitive edge.

A strong grasp of pitching stats translates directly into better in-game performance. High-quality pitchers can generate more strikeouts, reduce scoring chances, and consistently outplay tough opponents. In Diamond Dynasty, they also make it easier to complete objectives and earn rewards.

When you understand these attributes, you can make smarter decisions—whether you’re building a rotation, choosing relievers, or adjusting your strategy mid-game.

Breakdown of Key Pitching Attributes

Velocity

Velocity measures how fast a pitch travels. Higher speeds reduce a batter’s reaction time, making it easier to overpower hitters—especially with fastballs.

That said, pure speed isn’t everything. If a pitcher lacks control, high velocity can lead to missed spots and costly mistakes. The most effective pitchers combine speed with precision.

Control

Control determines how accurately a pitcher can locate their pitches. This stat is critical for hitting corners, avoiding walks, and setting up hitters with smart pitch sequences.

Pitchers with strong control can consistently execute their game plan, making them far more dependable—especially in tight situations.

Break (Movement)

Movement refers to how much a pitch veers off a straight path. This can include horizontal movement (side-to-side) or vertical drop.

High movement makes pitches deceptive and difficult to hit cleanly. Breaking balls like sliders and curveballs rely heavily on this attribute, as do off-speed pitches designed to disrupt timing.

Stamina

Stamina dictates how long a pitcher can remain effective before fatigue sets in. As stamina decreases, performance drops—velocity dips, and control becomes less reliable.

Starting pitchers benefit the most from high stamina, as it allows them to pitch deeper into games. Managing this attribute is especially important in longer modes where overusing pitchers can hurt your team over time.

Pitch Arsenal

A pitcher’s arsenal is the variety of pitches they can throw. Common options include fastballs, curveballs, sliders, changeups, and more.

The more diverse the arsenal, the harder it is for hitters to predict what’s coming. Mixing different pitch types, speeds, and movements keeps opponents guessing and prevents them from settling into a rhythm.

Pitch-Type Ratings

Each individual pitch also has its own effectiveness rating. These ratings determine how well specific pitches perform in terms of speed, control, and movement.

Fastballs rely on velocity and command
Breaking pitches depend on sharp movement
Off-speed pitches are designed to disrupt timing

Pitchers with strong ratings across multiple pitch types are significantly more dangerous because they can adapt their approach on the fly.

Clutch and Confidence

Mental attributes play a subtle but important role.

Clutch affects how a pitcher performs in high-pressure situations, like late innings or with runners on base.
Confidence influences overall consistency—low confidence can lead to less accurate and less effective pitches.

These traits often determine whether a pitcher can handle critical moments or falls apart under pressure.

Practical Tips for Better Pitching

To get the most out of your pitchers, it’s important to apply these attributes strategically:

1.Exploit matchups: Use pitchers whose strengths counter the opposing lineup’s tendencies.

2.Manage fatigue: Rotate your starters and avoid overusing arms to keep performance high.

3.Stay unpredictable: Mix pitch types, speeds, and locations to keep hitters off balance.

Improving your roster through upgrades or acquiring better players can also make a noticeable difference, especially when targeting pitchers with well-rounded attributes.

Pitching in MLB The Show 26 goes far beyond simply throwing strikes. Attributes like velocity, control, movement, and stamina all work together to define how effective a pitcher truly is.Skip the grind and play your way—MMOexp makes it easy to secure MLB The Show 26 Stubs quickly and safely. Add in pitch variety and mental toughness, and you have a complete system that rewards smart play and strategic thinking.

Master these attributes, and you’ll not only shut down opposing lineups—you’ll take full control of every game you play.Turn every swing into a home run with MMOexp reliable MLB 26 Stubs for sale service—your shortcut to building a championship team.

ARC Raiders:The Right Way to Start Your Next Expedition

Beginning a new Expedition in ARC Raiders can be daunting. An initial reset means starting with empty inventories, limited blueprints, scarce resources, and minimal medical supplies. While it might be tempting to dive into PvP right away, this early stage isn’t the time to challenge everyone in the lobby. Instead, focusing on creating a solid foundation for long-term progression is the smarter play.

This guide details the best strategies for kickstarting a new Expedition in ARC Raiders, including raid priorities, the value of quests, opportunities for financial gain, material farming, Scrappy upgrades, and skill tree planning.

1.Define Your Raid Objective Before You Deploy

    The most crucial decision takes place before you enter the game.

    Early resets demand discipline. You probably don’t have:

    Robust blueprints
    Ample healing supplies
    Backup gear kits
    Sufficient Space Dollars

    If you find yourself in a loot situation, focus on looting and extracting. Avoid unnecessary conflicts, especially when you’re carrying quest items or rare materials, as these can set you back significantly if you die.

    Many players have faced the frustration of losing quest items, only to encounter bugs or the need to re-farm. It’s entirely preventable. Establish your priorities and adhere to them.

    2.Should You Complete Quests Early?

      While it’s not mandatory to finish story quests for an Expedition, doing so early is highly beneficial.

      Completing the entire storyline grants access to powerful blueprints, including:

      Trigger Grenade Blueprint
      Lure Grenade Blueprint
      The Cracker Blueprint
      Braleta Blueprint

      These items prove advantageous in both PvP and PvE scenarios. Additionally, you’ll accumulate more resources and progression benefits that will compound as you progress.

      3.Prioritize Money Runs

        In ARC Raiders, Space Dollars are essential.

        Establishing a solid financial base enables you to:

        Purchase weapons like the Renegade
        Buy healing items
        Acquire smoke grenades
        Prepare for future Expeditions with necessary entry costs

        After a reset, experienced players quickly focus on money routes. What’s important is consistency; even low-risk runs that prioritize extraction can result in substantial financial growth over time.

        By the time the next Expedition requires funds, you’ll be ready while others scramble to gather them.

        4.Focus on Material Farming Early

          The second key strategy during the early reset is to gather crafting materials right away. Key materials include:

          Seeds
          Metal parts
          Fabric
          Mechanical components
          Electrical components
          Advanced electrical components

          Recycling is invaluable. Dismantle excess materials to build up the required components for future crafting.

          There’s nothing more frustrating than having a great PvP session, only to find you’re out of fabric to make a bandage. Prioritizing materials now will save headaches later.

          5.Upgrade Scrappy Early

            Scrappy often goes overlooked, especially by newcomers.

            Upgrading Scrappy provides passive material returns, and interestingly, it can recover more items if you die. This enhancement makes early upgrades exceptionally worthwhile.

            Investing in Scrappy early ensures you’re consistently acquiring resources, even during challenging sessions. It’s one of the most effective long-term investments in the game.

            6.Plan Your Skill Tree for the Long Haul

              The skill tree in ARC Raiders is personal, but early planning is essential.

              Many top players share their chosen builds, providing valuable reference points. Whether you opt for aggressive PvP configurations or balanced PvE survivability trees, consistency is key.

              Avoid spending skill points haphazardly. Every point counts at the beginning. Align your build with your raid objective to ensure efficient character development.

              7.The Importance of Early PvP Discipline

                PvP is an exciting feature of ARC Raiders, but at the start, preparation is paramount. Once you’ve:

                Built up a financial cushion
                Stockpiled materials
                Upgraded Scrappy
                Completed story rewards
                Optimized your skill tree
                You can engage in more fights with less risk of stagnation.

                Playing smart in the early stages allows you to transition to a more aggressive playstyle later.

                When your foundation is solid, your inventory will be filled with valuable ARC Raiders Items, your blueprints will be unlocked, and your economy will be stable. Whether you choose to grind for everything yourself or purchase cheap ARC Raiders BluePrints for quicker progression, proper preparation sets apart successful players from the frustrated ones.

                The Ultimate Hawker HX Class Setup for Call of Duty:Black Ops 7

                One of Call of Duty most iconic sniper rifles has made its comeback in Black Ops 7. Formerly known as the Ballista, the weapon now returns as the Hawker HX, a bolt-action sniper built for speed, precision, and aggressive play. When configured properly, the Hawker HX becomes one of the most lethal quickscoping rifles in the game, rewarding confident aim and fast reactions.

                The Hawker HX shines when optimized for handling. Its greatest strengths are fast aim-down-sight speed, rapid rechamber time, and consistent one-shot kills. This build prioritizes mobility and responsiveness while keeping recoil under control, allowing you to chain shots without losing momentum. It’s ideal for players who enjoy pushing lanes, challenging angles, and staying constantly on the move.

                This setup is designed specifically for aggressive sniping, focusing on quick ADS times, smooth quickscopes, and reliable follow-up shots.

                Optic:Iron Sight

                Improves ADS speed and reduces idle sway, offering a clean sight picture for fast reactions.

                Muzzle:SWF Tishina-11

                Keeps shots suppressed and prevents your firing position from appearing on the mini-map.

                Barrel:20.5″ Hawker Spring Barrel

                Boosts ADS speed and sprint-to-fire time, making the rifle feel lighter and more responsive.

                Underbarrel:Hawker Ridge Grip

                Tightens horizontal recoil to help stabilize the weapon after firing.

                Magazine:.338 Hawker Extension Mag

                Expands the magazine to 10 rounds, reducing reload frequency during streaks.

                Rear Grip:Auroral Light Grip

                Enhances ADS speed and jumping ADS performance for aggressive movement plays.

                Laser:5MW Lockstep Laser

                Improves hipfire-to-ADS transition accuracy, helping in emergency close-range fights.

                Fire Mods:Light Bolt

                Speeds up rechamber time and slightly increases fire rate, allowing faster follow-up shots.

                This attachment combination transforms the Hawker HX into a true quickscoping machine. The Iron Sight may feel unusual at first if you’re accustomed to traditional sniper scopes, but the faster ADS and clearer view make it ideal for mid-range engagements and rapid target acquisition.

                Key attachments like the Hawker Spring Barrel, Auroral Light Grip, and Light Bolt significantly improve weapon handling, allowing you to aim faster, recover quicker between shots, and maintain pressure during fast-paced encounters. The Hawker Ridge Grip helps offset recoil after each shot, keeping your follow-ups accurate and controlled.MMOexp Black Ops 7 Bot Lobbies give you a controlled, stress-free environment to unlock gear, refine strategies, and master Zombies mechanics at your own pace. Train smarter, progress faster, and step into live matches fully prepared.

                The SWF Tishina-11 suppressor rounds out the build by keeping you hidden while firing, which is crucial for aggressive flanking and repositioning.

                Best Hawker HX Class Setup in Black Ops 7

                A fast sniper requires a class built around speed, survivability, and momentum. This setup complements the Hawker HX’s aggressive nature and keeps you lethal from one engagement to the next.

                Recommended Class Setup

                Wildcard:Gunfighter

                Secondary:Personal preference

                Melee:Personal preference

                Field Upgrade:Mute Field

                Tactical:Stim Shot

                Lethal:Semtex

                Perk 1:Lightweight

                Perk 2:Scavenger

                Perk 3:Dexterity

                Combat Specialty:Enforcer

                The Gunfighter Wildcard is essential for this build, as it allows you to equip all eight attachments and fully unlock the Hawker HX’s quickscoping potential. Mute Field is the ideal Field Upgrade for aggressive snipers, granting the effects of Ninja, Ghost, and Cold Blooded. This lets you move quietly, stay off enemy radar, and take unexpected routes without being detected.

                Stim Shot is a core piece of the setup, providing instant healing and a brief speed boost. This makes it easier to re-engage after a kill or escape dangerous situations. Semtex offers a reliable explosive option for clearing objectives or finishing off enemies behind cover.

                Best Perks for Hawker HX Quickscoping

                The perk selection is designed to keep you moving and minimize downtime between fights:

                Lightweight improves overall mobility, especially after slides and dives.

                Scavenger ensures a steady supply of ammo and equipment during extended streaks.

                Dexterity reduces weapon movement and improves handling consistency, leading to cleaner shots.

                Equipping all three red perks activates the Enforcer Combat Specialty, granting increased movement speed and faster health regeneration after every kill. This synergy is perfect for aggressive quickscopers who thrive on constant pressure, whether you’re grinding Multiplayer or warming up after you cheap CoD BO7 Bot Lobbies.

                The Hawker HX is one of the most satisfying sniper rifles to use in Black Ops 7 Multiplayer when built correctly. With fast ADS speeds, rapid rechambering, and a movement-focused class setup, this loadout allows you to quickscope efficiently, stay mobile, and dominate close-to-mid-range engagements.